If you're here because you have been searching through forums like crazy trying to get a definitive grasp on how to mod your N40l...then you came to the right place.
I spent at least two hours just trying to find the right files and once I got everything I needed and the mod was working, I thought I needed to make this easier for the next guy.
The original steps below were pulled from - http://terfmop.co.uk/blog/2013/07/31/hp-proliant-n54l-bios-modification-guide-allow-hot-plug-sata-and-5th-sata-port/
I modified the steps to make it work for the latest O41100113.ROM Mod
**Make sure to Upgrade your bios to the original HP Bios version 041 before proceeding**
- Remove all drives, PCI cards, Network Cables, etc. (basically return it to how it came from the factory without the drives)
- Find a flash drive and format as Fat32 (At Least 1gb)
- Download “N40L Mod Files.zip” – This has ALL the files you will need for this process
- Extract the Zip and run SP64420.exe.
- Keep going until you get to the screen where you’re asked where you’d like the files saved. Remember where you saved the files to, in my case it’s a folder on the ‘C:’ drive.
- The application should finish, exit and load a webpage automatically.
- If for some reason it doesn’t , the flashing utility can be run manually by navigating to the directory where you saved the files and running ‘HPQUSB.exe’ This file can be found in the ‘Flat Files’ or ‘USB Key’ subdirectories, in my case it could be found in the directory ‘C:\SWSetup\SP64420\USBKey\HPQUSB.exe’. *
- Run HPQUSB.exe
- Select your memory stick as the device – MAKE SURE THIS IS THE CORRECT DEVICE AS THIS UTILITY WILL WIPE THE DEVICE SELECTED.
- Click Start and go through the application – the memory stick should now be reformatted.
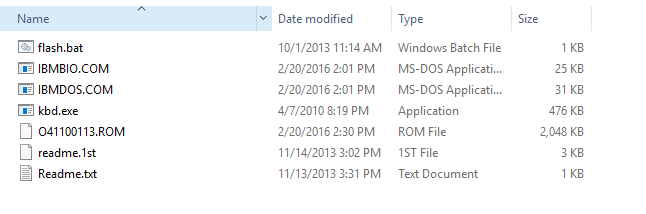
- Go to your memory stick in My Computer, you should see files there as shown in the picture below.